Azure Logic apps is Microsoft Azure’s Integration and Work flow offering in the Cloud. Azure Logic apps directly competes with existing Integration and Workflow cloud offering such as Amazon’s Simple Workflow Service. It also offers a more lightweight alternative to more heavyweight Enterprise solutions such as Microsoft BizTalk, Oracle fusion or Mulesoft. If you are SMB or event larger Enterprise then Logic Apps offers a solution to automating business processes/workflows which you may have been developing bespoke Applications for.
WORKFLOW ENGINE IN THE CLOUD
Azure logic Apps is essentially a workflow engine in the cloud. The Cloud based service is part of Microsoft Azure’s App service Paas offering. Unlike developing custom bespoke workflow applications Azure Logic apps comes out of the box with features such as:
- Custom retry policy. No need to code any retry, Azure Logic App will handle this.
- Managed scale. Azure will scale out your workflow runs with the resource it needs. No need to provision VMs.
Like any workflow engine Azure Logic Apps provides numerous connectors which can be used when building your workflow. For a comprehensive list of connectors see: https://docs.microsoft.com/en-us/azure/connectors/apis-list
THE ANATOMY OF A LOGIC APP
Essentially Logic Apps are composed of two key components:
- Trigger. An event such as a file being created on a share.
- Action. A subsequent action in response to the trigger, for example a notification e-mail being sent to your personal e-mail account. An action can further be decomposed into a combination of actions, conversions (transformations) and conditional logic.
To achieve this Azure Logic Apps makes use of the concept of connectors. Connectors are hosted services which allow to access events, data, and actions across numerous services, Apis and platforms. An example would be a connector to Twilio SMS service if you want to integrate your workflow with SMS messaging.
The power of connectors is that they can be used as a trigger as well as an action.
CREATING A LOGIC APP
Next we will demonstrate a simple example of creating a basic Logic App. The scenario will demonstrate receiving an e-mail notification when an upload of a txt file occurs to a folder in your personal “One drive”. This example will demonstrate the concept of setting up a connector and a basic workflow with simple rules to decide on what to do when a trigger occurs.
Login to the Azure portal https://portal.azure.com/
Select New from the left hand menu. In the search bar enter Logic App. Hit Enter.

On the next screen click create. This will bring up the Create logic app blade.
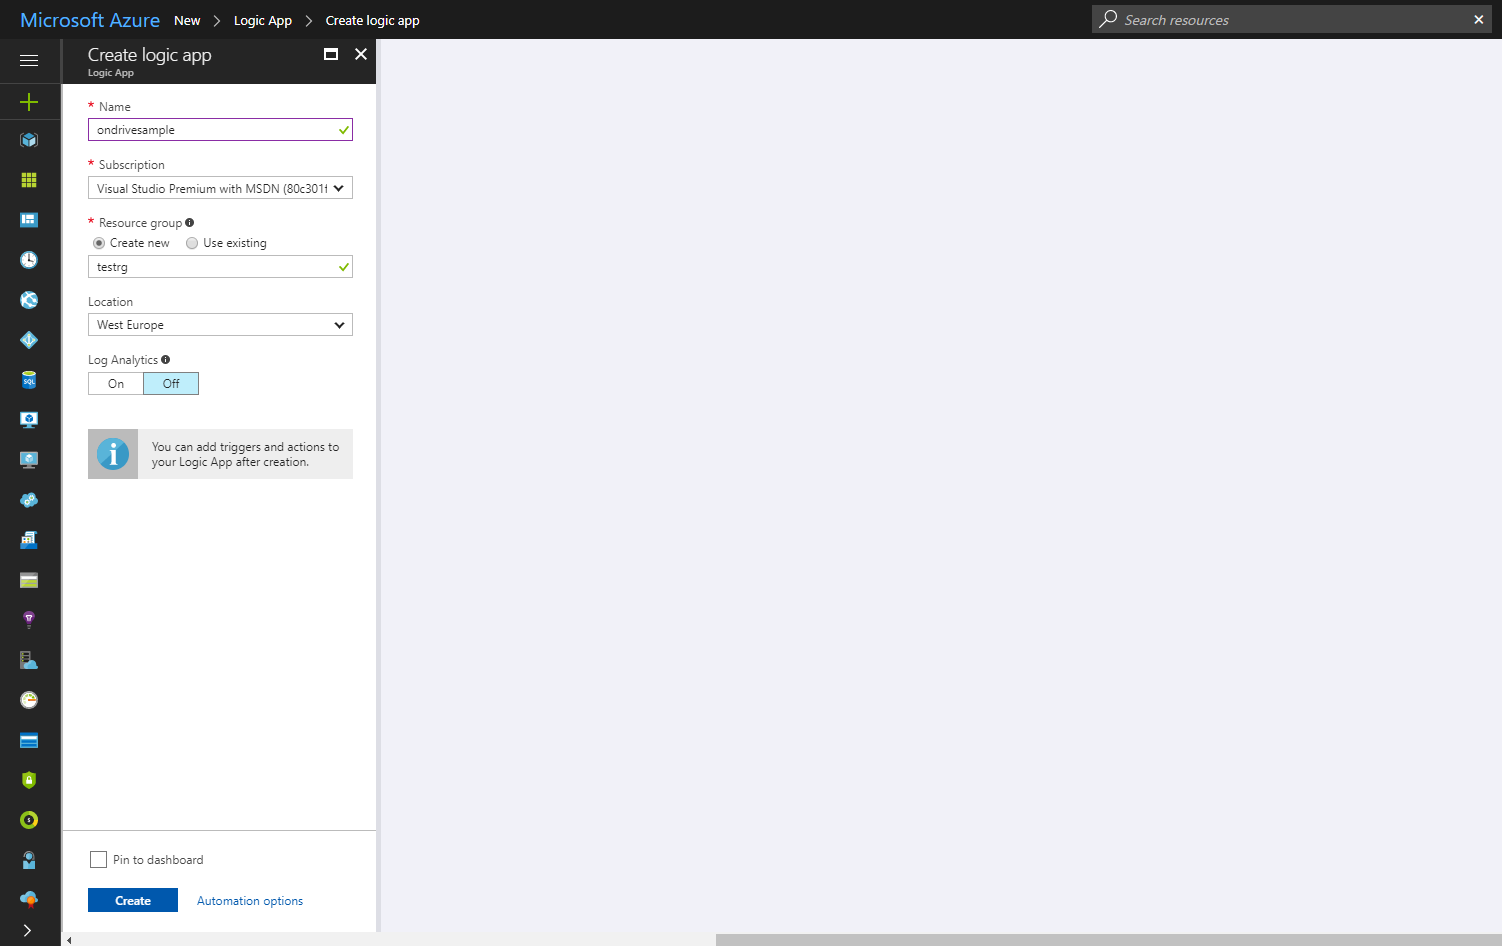
Azure app services require a Resource Group to be specified. A resource group is the basic logical container for any deployment in the new Azure portal deployment model (ARM). You can specify an existing or new resource group. Specify a location for the resource group. Click on create. Azure will now create a Logic App.
USING THE DESIGNER
Logic apps are created using the Azure Portal Logic App designer. Once your Logic app has been created click on the “Logic App Designer” item in the left hand pane under the heading “Deployment Tools”. This will bring up the designer.
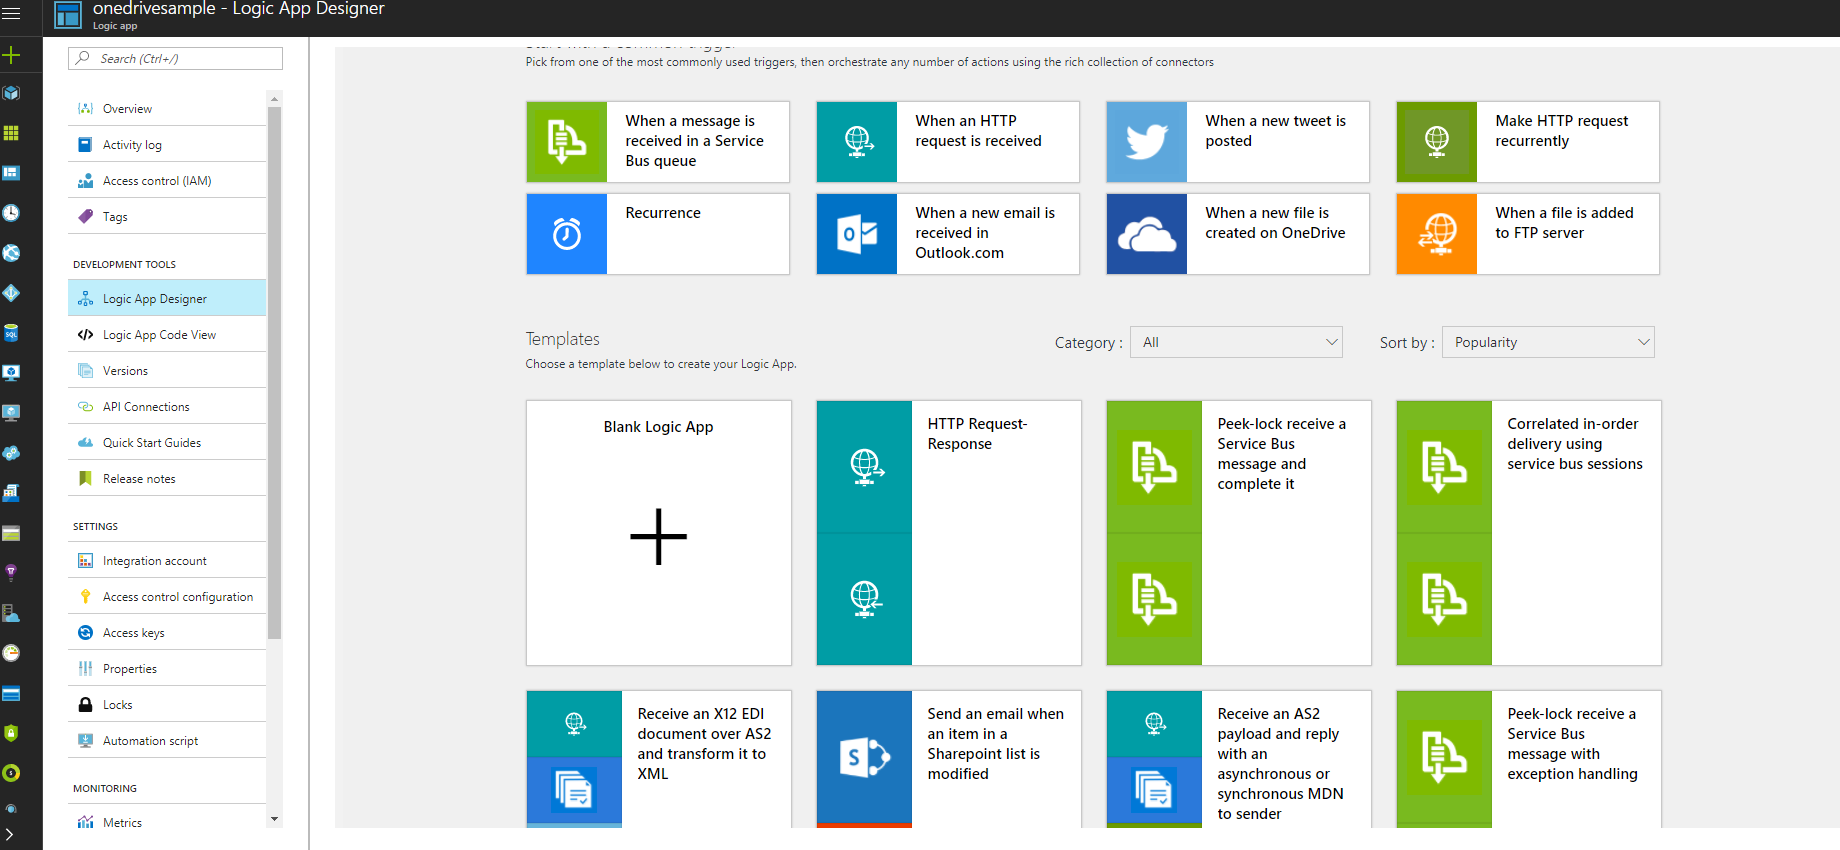
As can be seen from the above screenshot the designer comes with preconfigured template triggers to get you started. In this example we want to build a workflow from scratch so select the “Blank logic App”. This will load the search connectors/triggers screen.
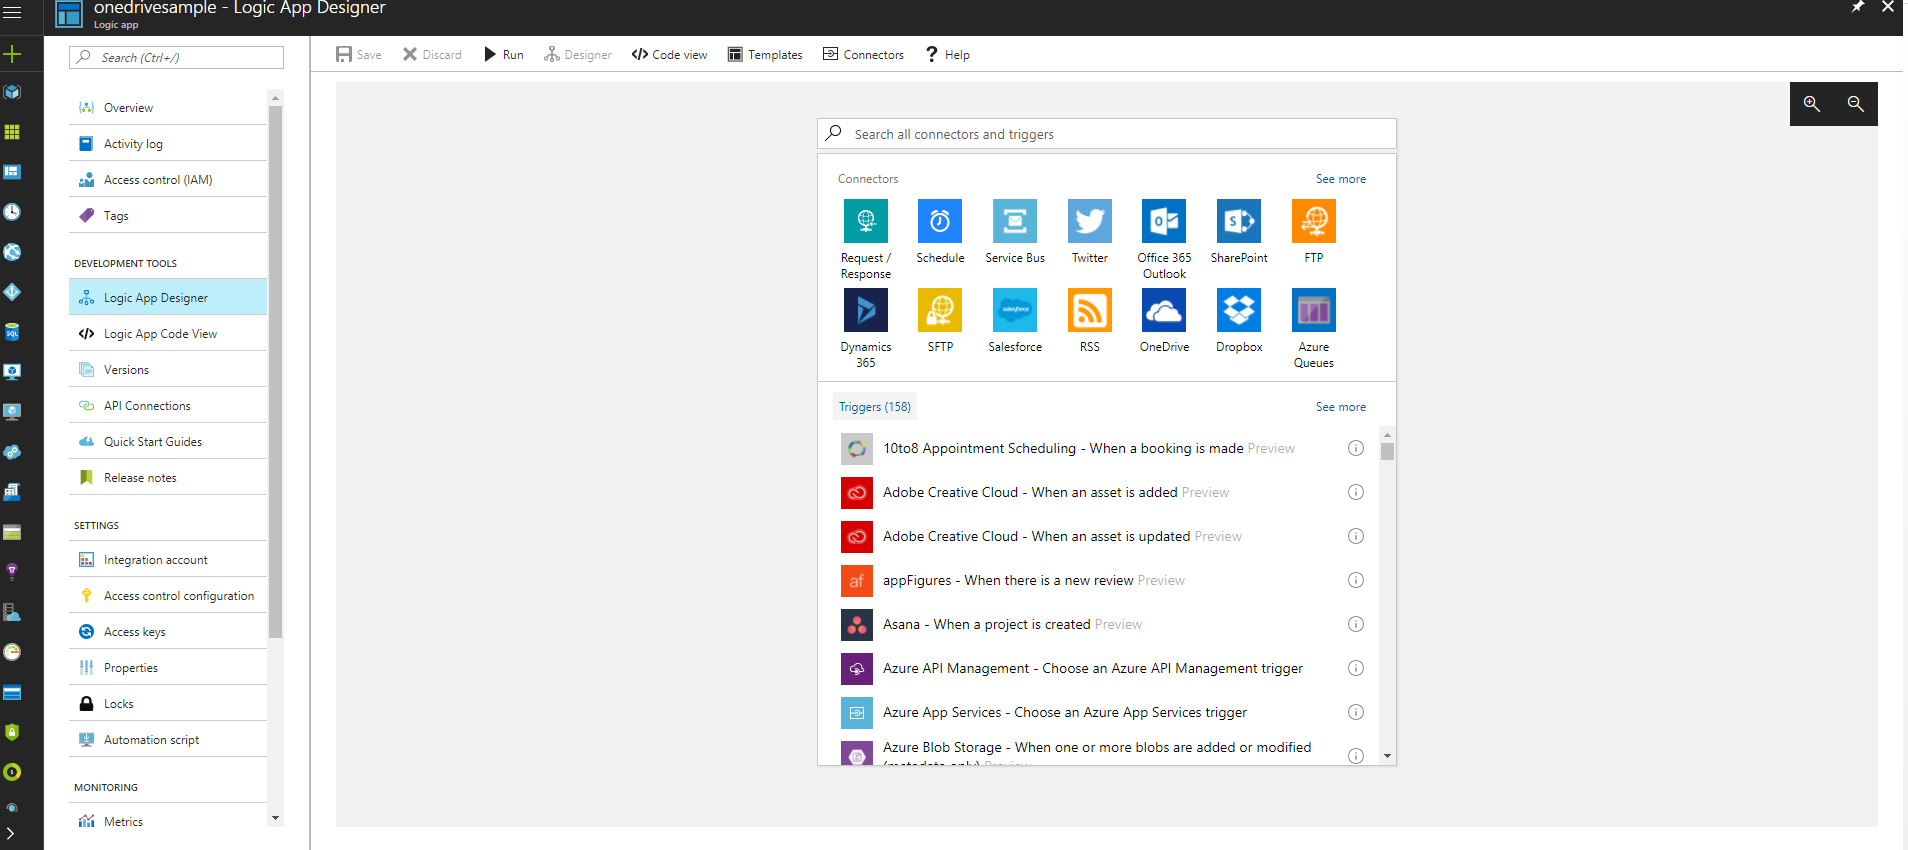
In the search bar type “OneDrive”. A list of connectors will appear. Select “OneDrive” (not OneDrive for business). You will now be asked to login. Login and accept the permissions you are allowing Logic app to access. Once you have done this another screen will appear asking you which trigger you want to select.
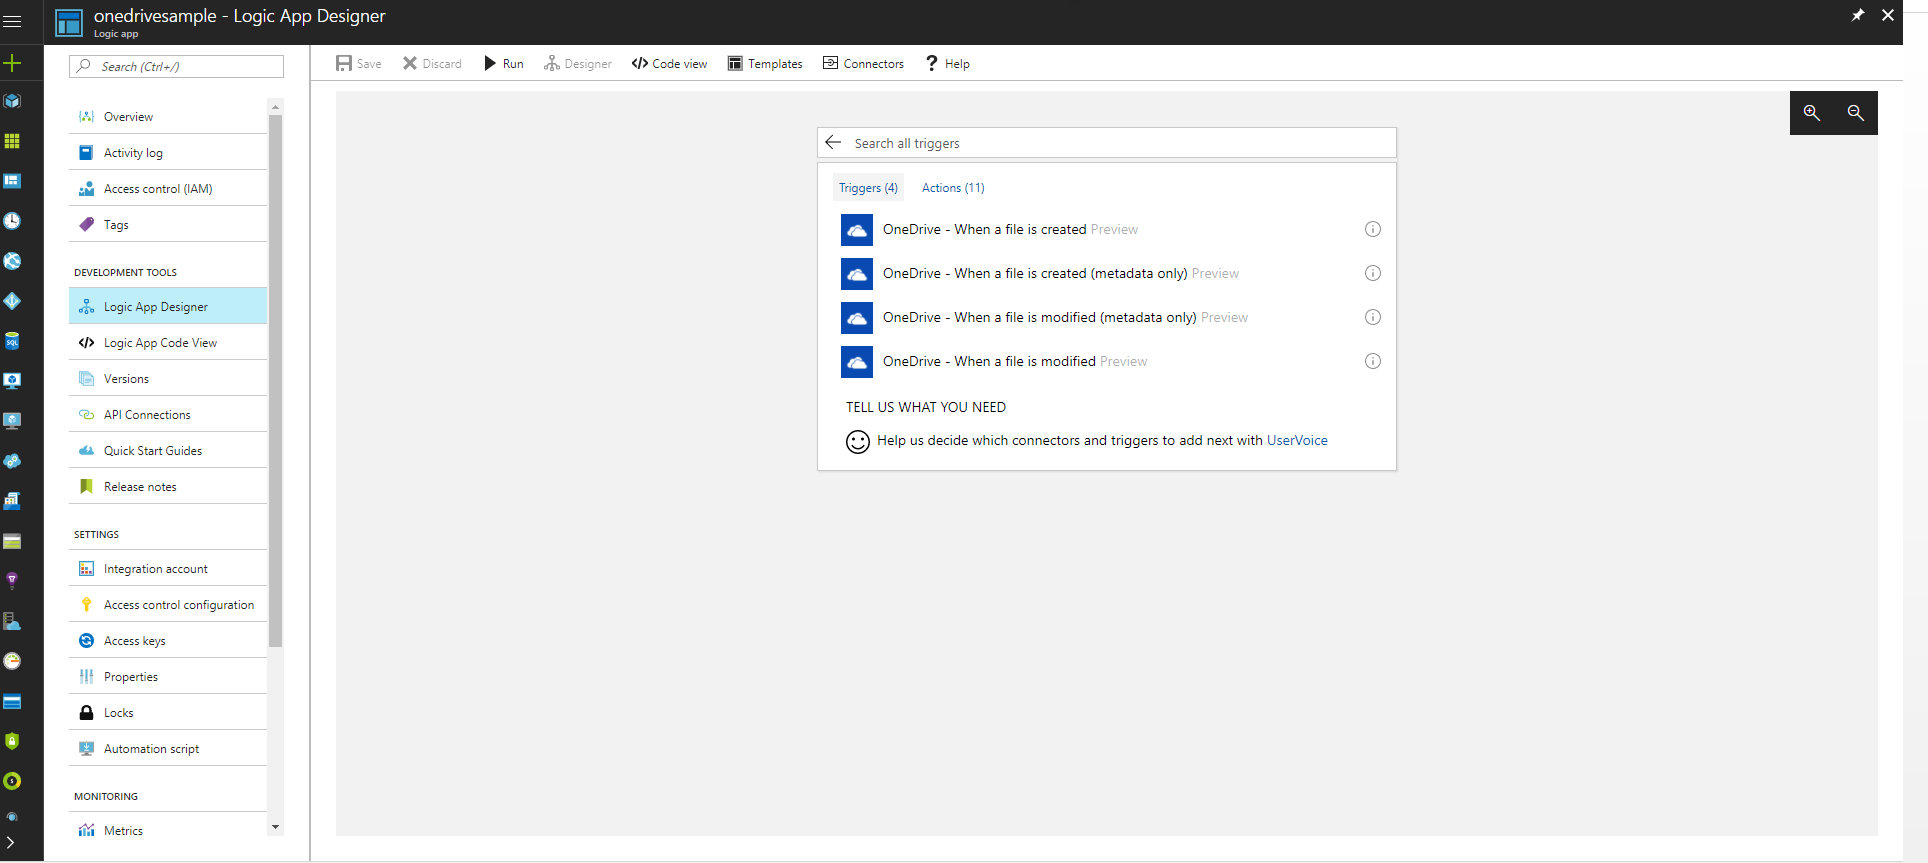
Select “OneDrive – When a file is created” option. This will bring up the next screen where you choose your file watch options:
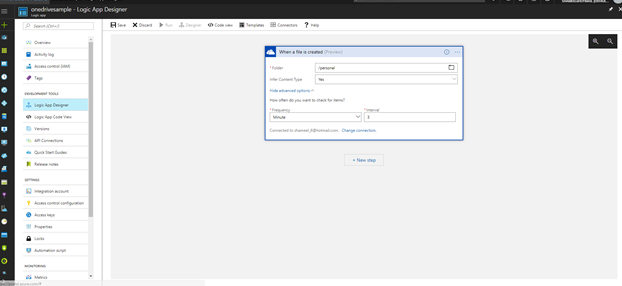
In this example I have selected the OneDrive folder “Personal”. Feel free to select any folder you want to watch. Leave the other options with their default values.
The next part of the workflow is to send a notification e-mail using your personal g-mail. Click on “New step”. Type “Send email” in the search bar of the new step. Select g-mail. You will be asked to sign in to give authorization to your Logic app for your g-mail account.
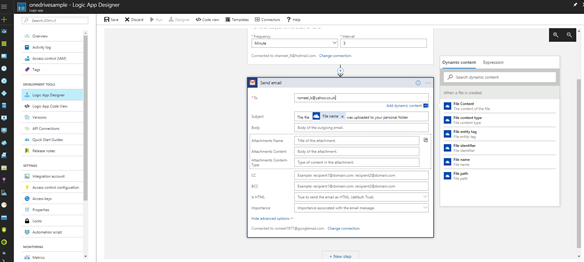
In the send e-mail step fill in the Send-email form. Enter the “To” address field. Enter a valid e-mail address to send the notification to. Notice to the right of the “Send email” form is a popup window. This allows you to select dynamic metadata from the file to be part of your e-mail. In the screenshot above you can see you have the following options to select from:
- File Content
- File Content type
- File entity tag
- File identifier
- File name
- File path
In this example we will use the “File name” property. In the Subject field enter the text “The file” then select the “File Name” metadata from the “Dynamic content” tab of the popup window. After selecting the metadata add the rest of the line “was uploaded to your personal folder”.
As well as adding Dynamic content you can use a rich set of Expressions from the “Expression” tab:
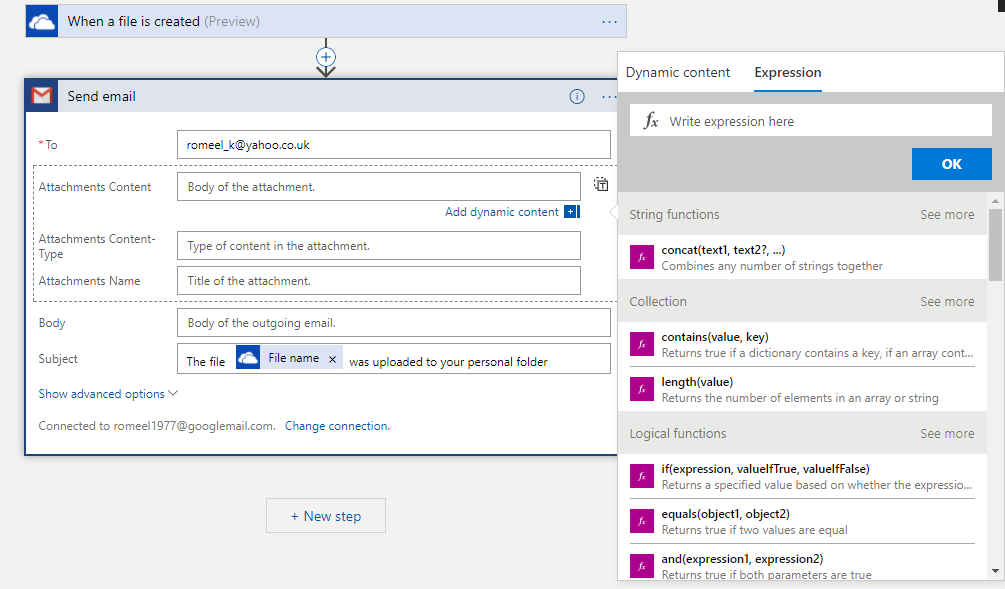
You can select from a rich set of expressions that include: String functions, Collection functions, Logical functions and more. For a full selection of functions please visit the URL: https://docs.microsoft.com/en-gb/azure/logic-apps/logic-apps-workflow-definition-language
Save your workflow in the designer by clicking on the “Save” icon at the top of the designer screen.
CONDITIONAL RULES
For more logical operations you can set conditions on a step. This is where you can define logical conditions on what to do before calling a specific action. Click on “New step” after creating the first action.
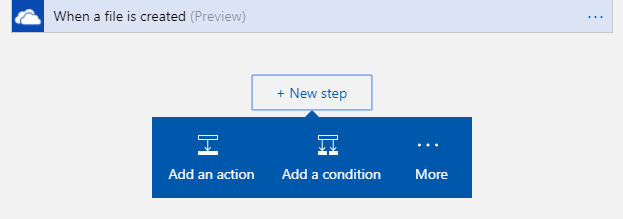
Select add a condition:
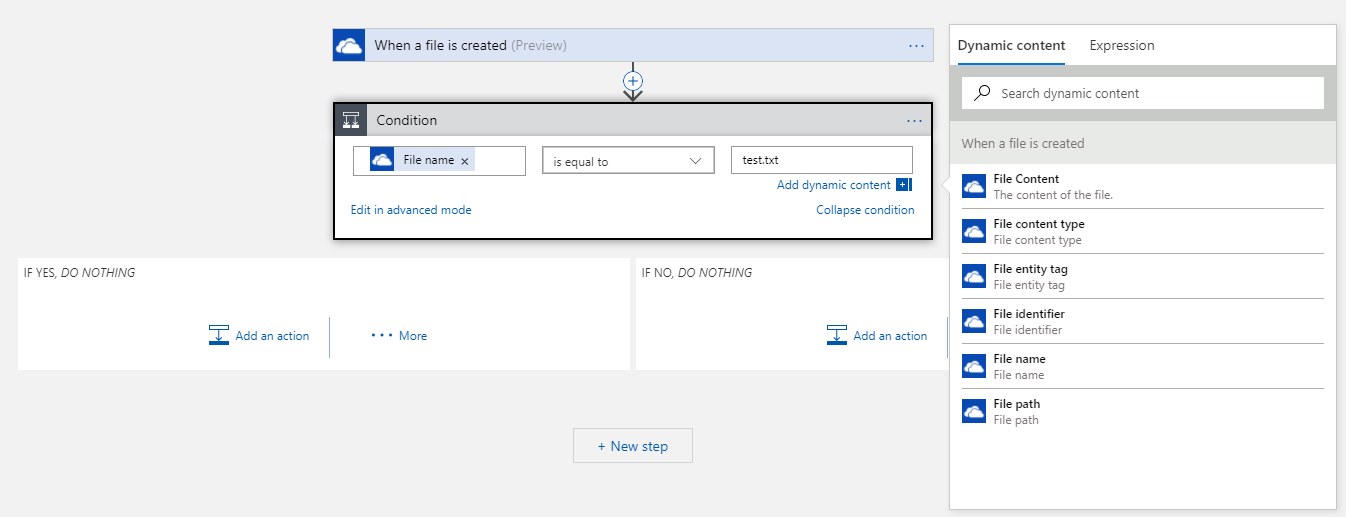
As can be seen from the above screenshot Logic apps provides both conditional operators and dynamic expressions to write logic to perform an action. In the above example a file name is checked to be equal to a specific named file.
TEST YOUR WORKFLOW
Testing your workflow. To test simply create a text file in your personal one drive. For this example I have uploaded an empty text file called sample.txt into the Personal folder. The workflow is configured to check every 3 minutes. You can additionally select the run link at the top of your Designer view. Click on the Run link. This will execute the workflow.
If your workflow is successful then you should receive an e-mail with the subject line:
The file sample.txt was uploaded to your personal folder
As you can see the logic app has inserted the File Name into the subject text.
MONITORING YOUR WORKFLOW
To monitor the success or failure of your workflow you can select the “Overview” link on the left hand pane of your Logic App.
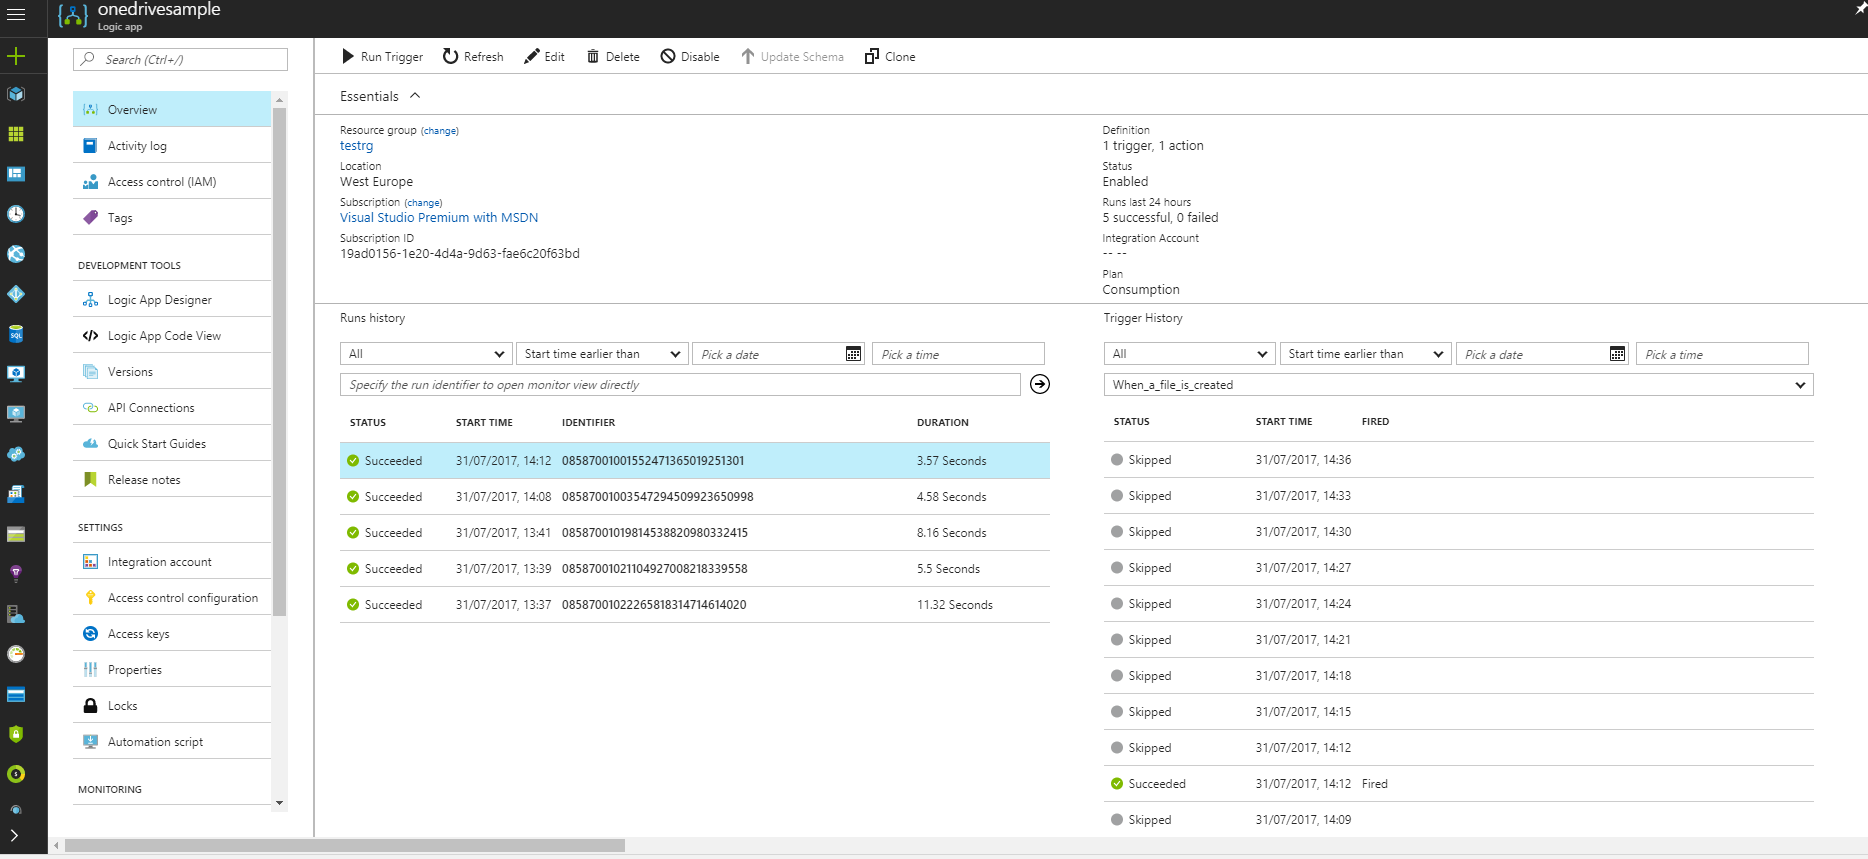
This will load the overview blade. This blade shows the status of your workflow runs. You can select on a run to see further details.
Once selected a screen will load showing the overall status of the workflow.
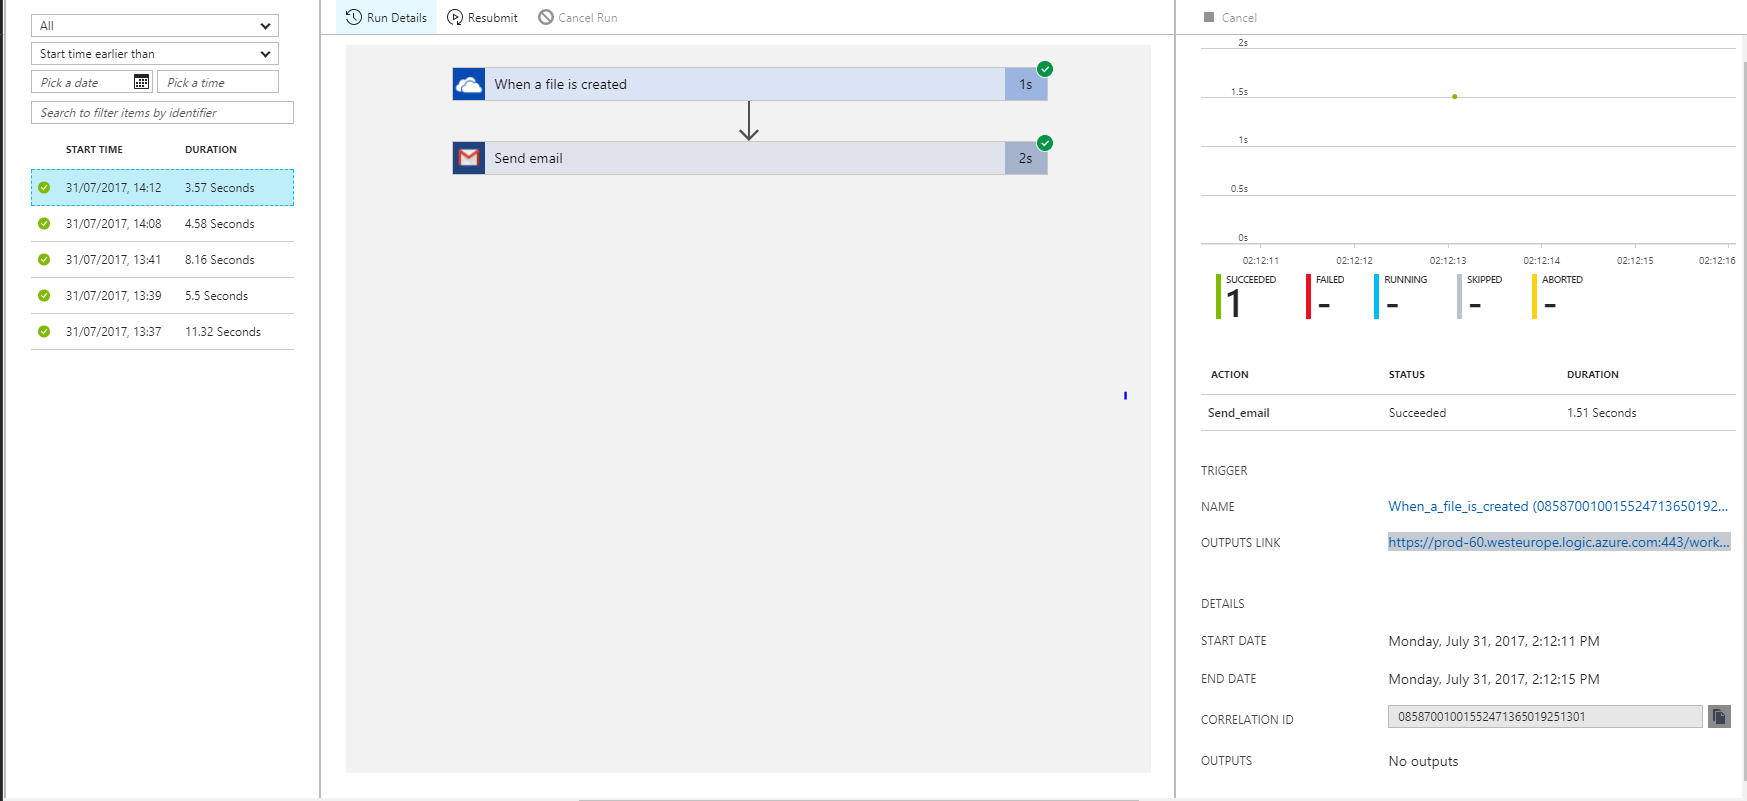
As the above screenshot shows each trigger/action is shown with a tick.
ENTERPRISE INTEGRATION
For common integration scenarios Azure Logic Apps provides a rich set of connectors and triggers. However, for more enterprise B2B scenarios that involve more complex data flows, protocols and data interchange formats such as xml then a more advanced approach is required.
Now available for Azure Logic Apps is the ability to build Logic Apps with its new Enterprise Integration pack. This supports the following features:
- Connectors for protocols, SaaS, Enterprise systems
- Validation
- Batching/Debatching
- Format Conversion (XML, JSON, Flat file)
- Extract
- Transform
- Trading Partner Management
- Support for B2B – AS2/X12/EDIFACT (EDI)
CORE COMPONENTS OF ENTERPRISE INTEGRATION PACK
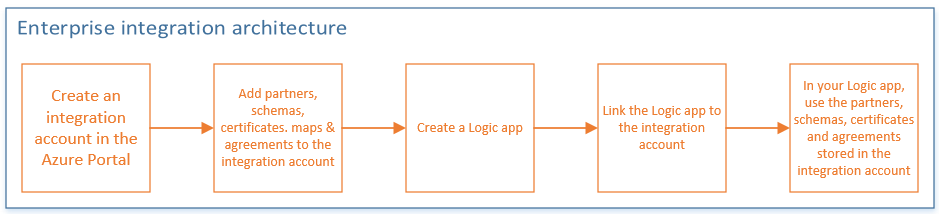
Before you can start creating your complex B2B integration work flows there are a few prerequisites steps you must follow. Using Azure Enterprise Integration pack requires you to create the following:
- Create an integration account in the Azure Portal
- Add your schemas, maps, certificates and agreements
- Create your Logic App
- Link the Logic App to the Integration account
- Make use of the schemas and other artifacts to build your complex B2B integration workflows
INTEGRATION ACCOUNT
An integration account can contain the following types of artifacts:
- XML Schemas. Important for Web Services interoperability between B2B systems
- XSLT based maps. XML transformation from view format to another
- Trading partners. A B2B partner you do business with through B2B messaging and transactions
- Trading partner agreements. This is a document that sets out the standard protocols and message formats that are agreed between the two business parties when exchanging EDI messages. Three formats are supported:
- AS2
- X12
- EDIFACT
- Public/private key certificates. Used for message security
VISUAL STUDIO INTEGRATION
Visual Studio 2015 comes with an extension called Enterprise Integration Tool. This extension adds new Integration project template. This allows integration developers to define:
- Maps
- Flat File
- Xml Schema
The key benefit of this project template is it provides IDE experience for creating the key artifacts that can be uploaded to your Azure Logic App Enterprise Integration account.
INTEGRATION PACK CONNECTORS
Once you have defined your message schemas, as with all Enterprise integration scenarios you will want to build your Enterprise workflow. The Enterprise Integration Pack provides a suite of connectors to choose from:
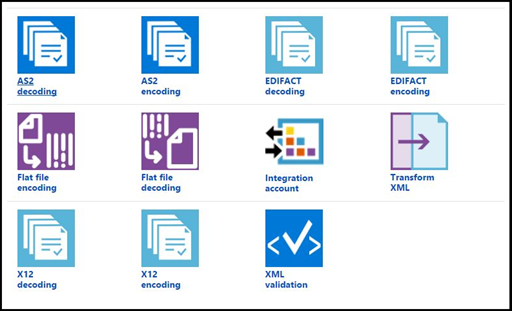
The enterprise connectors shown in the screenshot above cover both EDI and standard Flat file processing capabilities.
ON PREMISE PACK CONNECTORS
For more hybrid scenarios, Azure Logic app offers integration with existing on premise data sources using the on premises data gateway. The on premise gateway provides a secure channel for transferring data from your on-premises data sources. It currently supports the following sources:
- BizTalk Server 2016
- DB2
- File System
- Informix
- MQ
- MySQL
- Oracle Database
- PostgreSQL
- SAP Application Server
- SAP Message Server
- SharePoint
- SQL Server
- Teradata
For further details of setting up a on premises gateway please visit he Azure documentation for a more detailed walkthrough: https://docs.microsoft.com/en-us/azure/logic-apps/logic-apps-gateway-connection
CONCLUSION
Azure Logic apps offers an attractive solution for SMB or even larger enterprises to build cloud based business workflows. Furthermore, with the addition of the Enterprise Integration pack it is now possible to build B2B integration workflows in the Cloud. Companies can create an Integration account to store their key B2B artifacts. This then allows developers to build more complex B2B workflows using the available connectors. This can then be further extended to hybrid scenarios where data sources are on premise using the “On premise data gateway” in Azure.
No comments:
Post a Comment