Learn about how you can use Subscription Keys, OAuth 2.0 and Profiles to safeguard your APIs using Azure API Management.

In the previous article we looked at Azure API Management (APIM) at a high level, and talked about some of the challenges you may face as you start exposing APIs.
In this article we will look at some of the ways to look after your API when you expose it. This includes: subscription keys, securing the back-end API, OAuth 2.0 and rate-limiting.
Subscription Keys
To expose an API in APIM you first need to add the API definition. This is how you configure various properties such as the root URL exposed from APIM, the root URL of the back-end API, and the different operations that the API exposes.
Once you have created the API definition you need to create a Product. In APIM a Product is a set of 1 or more API definitions. The Product is also the level at which you grant access to APIs to application developers. When you grant a developer access to a Product they are provided with a subscription key and have to include this key on requests that they make to the API.
Securing the API
Now that developers need to pass their subscription key to the APIM proxy, you don’t want them directly calling your back-end API. There is currently support for mutual certificate authenticationwhich allows you to configure APIM to verify the identity of the back-end API using a certificate, and to specify the certificate that APIM should use to validate itself to the back-end API. With this in place, only callers (such as APIM) that have the certificate can successfully call your API.
The recently announced preview of APIM Premium adds a number of features, including support for Azure VPN. Now you can also set up a virtual network in Azure using VPN (or Express Route). This virtual network is used to bridge from your internal network into Azure, allowing APIM to call your back-end API without it needing to be exposed publically. For more information on APIM Premium see the high-level comparison between the tiers of APIM on the pricing page.
APIM and OAuth 2.0
So far we’ve covered a couple of aspects of security: firstly the use of subscription keys to identify the developers and applications calling your API, and secondly the use of mutual certificate authentication to allow the APIM proxy and back-end API to verify each other. In addition, you may want end users (i.e. the people using the applications that are calling your API) to be authenticated.
A common approach to authentication with APIs is the use of OAuth 2.0 and bearer tokens. These tokens are passed in the Authorization header of the request, and the APIM proxy will simply pass the token through to the back-end API without needing to configure anything else.
However, if you attempt to call such an API from the interactive console that we saw last time then by default you will get a 401 Unauthorized response as APIM doesn’t know anything about the authentication to use and so cannot send a value in the Authorization header.
Fortunately we can configure OAuth 2.0 Authorization Servers in APIM. As you can see below, the configuration for an Authorization Server allows you to specify which flow(s) you want to support and configure the endpoints etc. This configuration can be accessed from the Security menu in the Management Console, and then by choosing “Add Authorization Server” under the OAuth 2.0 tab.
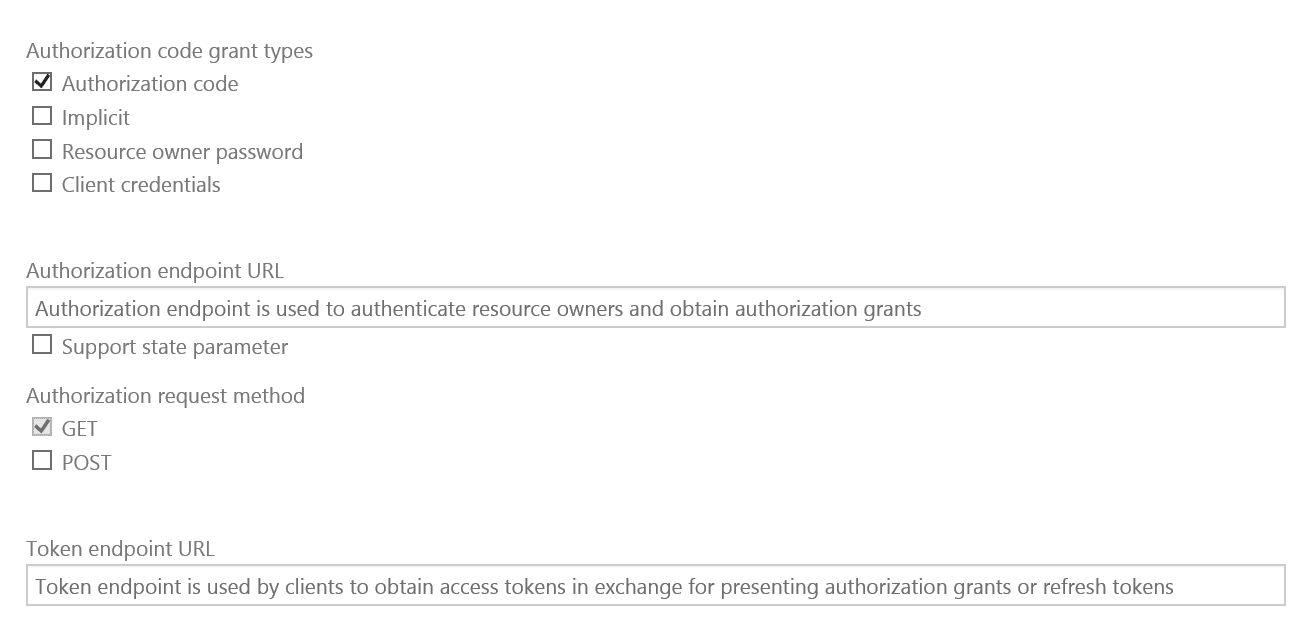
Figure 1: Add OAuth Server
After you have configured an Authorization Server you associate it with your APIs using the Security tab (under the API section) as shown below.
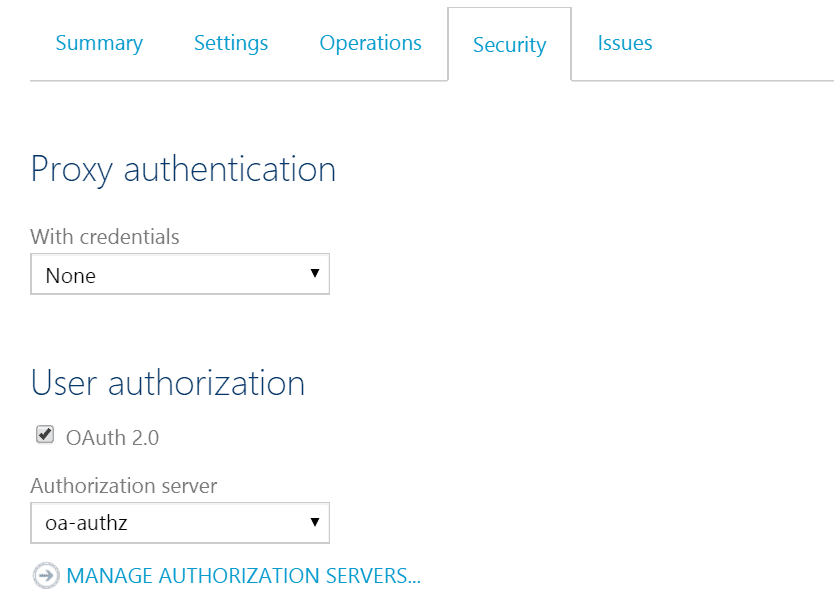
Figure 2: OAuth Configuration
Once this is done then the interactive console will add an additional option that allows you to specify the authentication type to use for the call. Selecting an option triggers the relevant OAuth 2.0 flow.
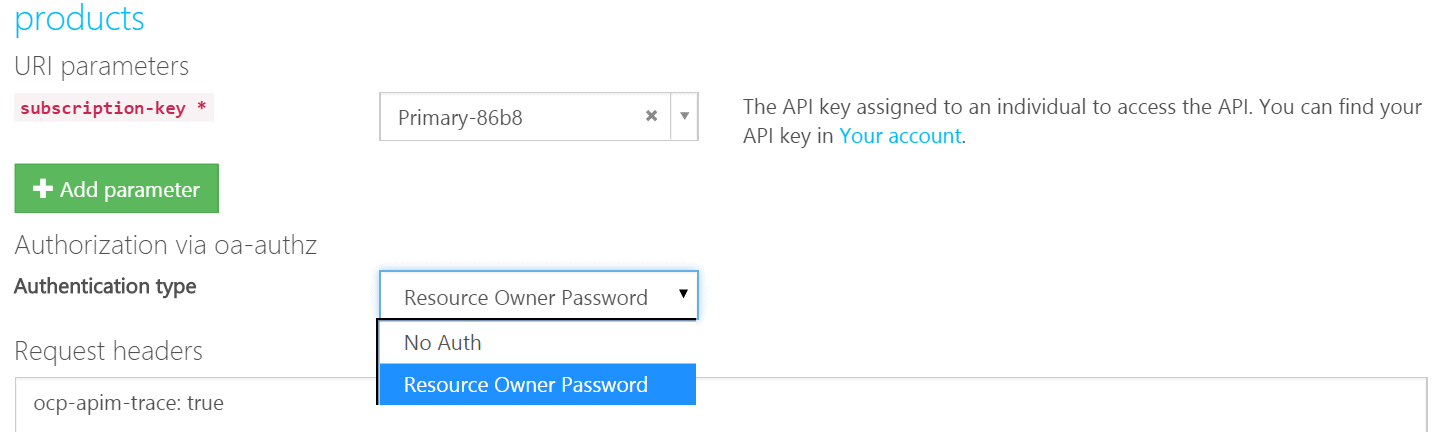
Figure 3: OAuth Interactive Console
Lastly on the OAuth front, you can also configure APIM to check that requests have a valid JWT to prevent unauthorized requests from even reaching your back-end API. This is configured through the use of policies, which we will look at in the next sections.
Surviving the storm
So far we’ve looked at a couple of security-related aspects of protecting your API. When you open up your API to other parties you might also want to put in place other characteristics such as limiting the number of calls that applications can make to your API. This can help you to avoid your API being overwhelmed by requests, but also opens up business opportunities to charge people if they want to make heavier use of your API.
Rate-limiting in APIM is applied as a policy. Policies in APIM are behaviours that you can apply to your API. APIM has a range of policies that you can apply, and they can be configured against a Product, API, or Operation. For a full list of the APIM policies bookmark the Azure API Management Policy Reference.
The rate-limit policy is applied at the Product level. The screenshot below show the rate-limit configured for the “Starter” product to limit to 10 calls per minute (60 seconds) for each subscription key. The Policy Statements section on the right-hand side is a quick way to add the basic definition for each policy rather than having to type out the XML.
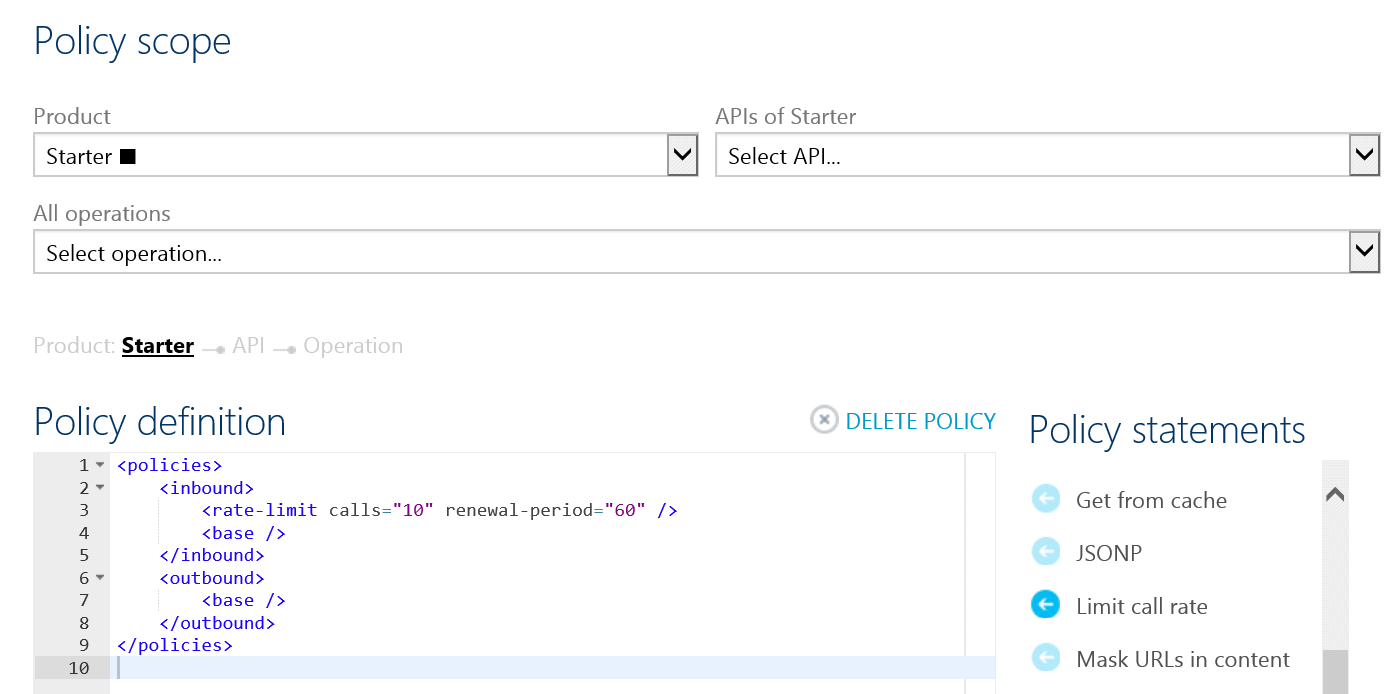
Figure 4: Setting a Rate Limit Policy
You may decide to apply a rate limit as above (i.e. up to 10 calls per 60 seconds), but also define a quota for calls over a broader period (e.g. 1000 calls per week). To achieve this you can add the quota policy in as shown below. (Note that 60 seconds * 60 minutes * 24 hours * 7 days = 604800 seconds).
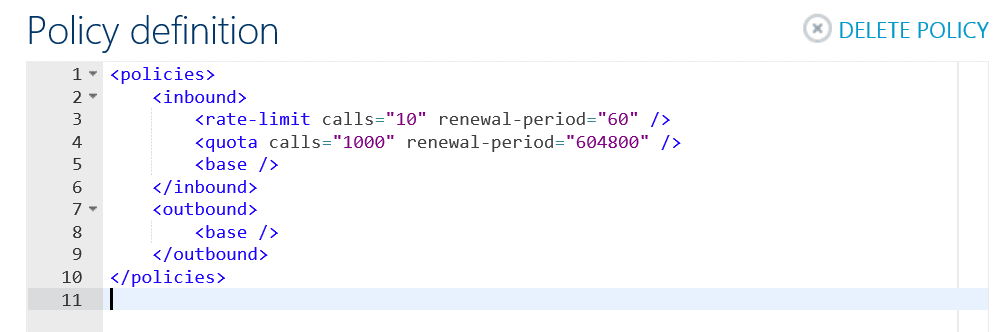
Figure 5: Policy Definition
By creating multiple Products to include your API in you can apply different policies over the same API definition. E.g. Bronze, Silver and Gold Products could all include the same set of APIs, but with different policies. This allows you to create a business model where developers are charged according to their allowed usage. You can use the analytics in APIM (which we’ll cover in a future article) to identify those developers who are close to their usage allowance and then approach them about moving plans.
More about Policies
In the APIM processing pipeline, policies can be applied inbound (i.e. on the incoming request before it is passed to the back-end API) or outbound (i.e. before the response is returned to the caller). Some policies only make sense at either the inbound or outbound stage, e.g. rate-limiting doesn’t make sense to do after calling the back-end API. Other policies that can be applied as either inbound or outbound policies, such as “Set HTTP Header” or “Convert XML to Json”.
We’ve already mentioned that policies can be applied at various scopes: globally or bound to a Product, API or Operation. When you configure policies you include a “base” policy which is a placeholder that indicates where the rest of the policy hierarchy is pulled in (see below).
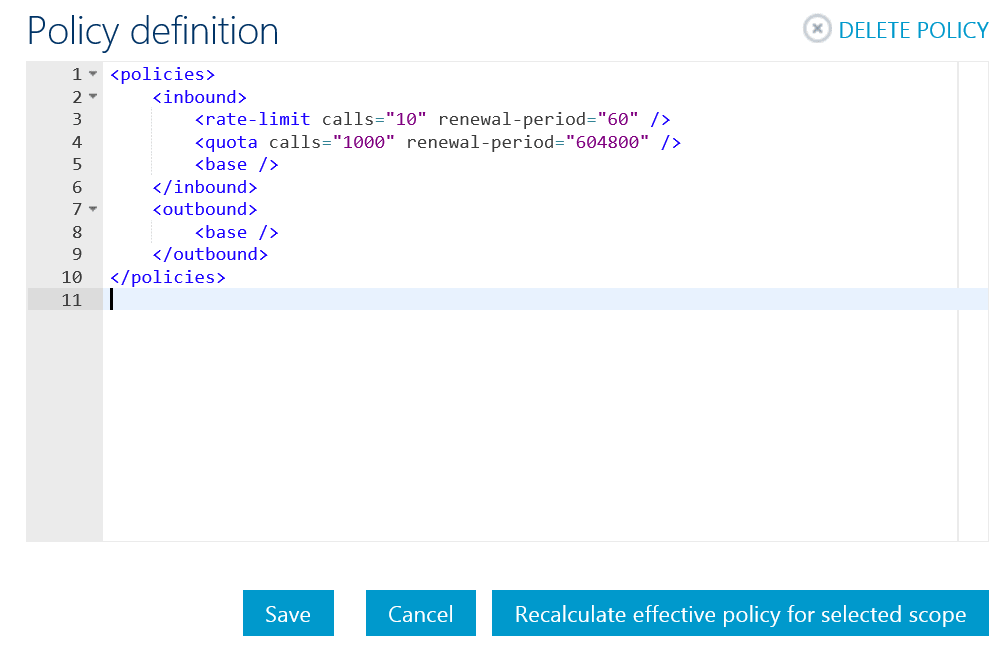
Figure 6: Showing policy hierarchy
When policies are collapsed APIM starts at the most specific scope and works from there out, i.e. starts at operation, then API, product and finally global. This means that the global policies are pulled in at the <base/> element for the product configuration, the resulting product policies are pulled in at the <base/> element for the API configuration and finally the resulting API policies are pulled in at the <base/> element for the operation configuration. To illustrate, imagine that we have the following pseudo-configurations:
<!-- operation policy: -->
<!-- operation policy 1 -->
<base/>
<!-- operation policy 2 -->
<!-- api policy: -->
<!-- api policy 1 -->
<base/>
<!-- api policy 2 -->
<!-- product policy: -->
<!-- product policy 1 -->
<base/>
<!-- product policy 2 -->
<!-- global policy: -->
<!-- global policy 1 -->
|
When these are collapsed we end up with the following pseudo-configuration:
<!-- effective policy: -->
<!-- operation policy 1 -->
<!-- api policy 1 -->
<!-- product policy 1 -->
<!-- global policy 1 -->
<!-- product policy 2 -->
<!-- api policy 2 -->
<!-- operation policy 2 -->
|
This has the potential to get a little complicated, so APIM provides an ability to see the collapsed policy. Simply select the Product, API and Operation combination that you’re interested in and then click the “Recalculate effective policy for selected scope” button. This will bring up a pop-up that shows you the policy configuration that will be applied for that combination. An example is shown below (this uses the same configuration as in the policy definition we just saw for an operation with URI rewriting applied).
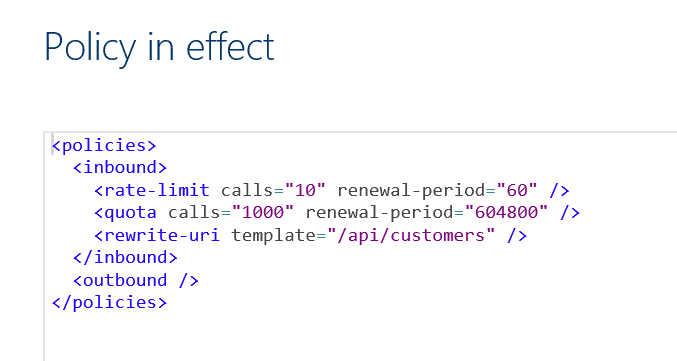
Figure 7: Policy in Effect
Next…!!
This article has covered a lot of different aspects of taking care of your back-end API: subscription keys, OAuth 2.0, rate-limiting and quotas. APIM takes care of the implementation of subscription keys, rate-limiting, and quotas (and many more behaviours) through policies to make them simple to incorporate into your APIs. You can additionally define quotas etc. at different scopes across Products with very little effort.
Policies are a central part of the work you do with APIM, so when you’re working with APIM be sure to have the link to the API Reference documentation handy!
In a future article we’ll take a look at how you can use policies to apply caching to responses. This can help keep the back-end API healthy as well as improving the performance for callers. We’ll also look at the analytics features in APIM that are useful for understanding how well the API is performing and being used.
Thanks to Josh Twist and Vladimir Vinogradsky from the Azure API Management team for reviewing this article.
No comments:
Post a Comment