Published:
Automate it. Now, where’s that script…Warning: PowerShell is addictive.
Meet PowerShell Tutorial
Windows PowerShell is an object-oriented automation engine and scripting language with an interactive command-line shell designed to help IT professionals configure systems and automate administrative tasks. You can find it in every modern Windows OS starting with Windows 2008R2. Learning Windows PowerShell is like learning to use a universal multi-tool. In this post, I cover PowerShell scripting basics so you can more easily perform virtually any administration task related to your Windows IT environment.
So let’s start learning PowerShell.
PowerShell offers both a command-line option and an integrated scripting environment (ISE):
- To launch the PowerShell command line, type powershell.exe in the Windows Start menu. You’ll see a screen like the following:

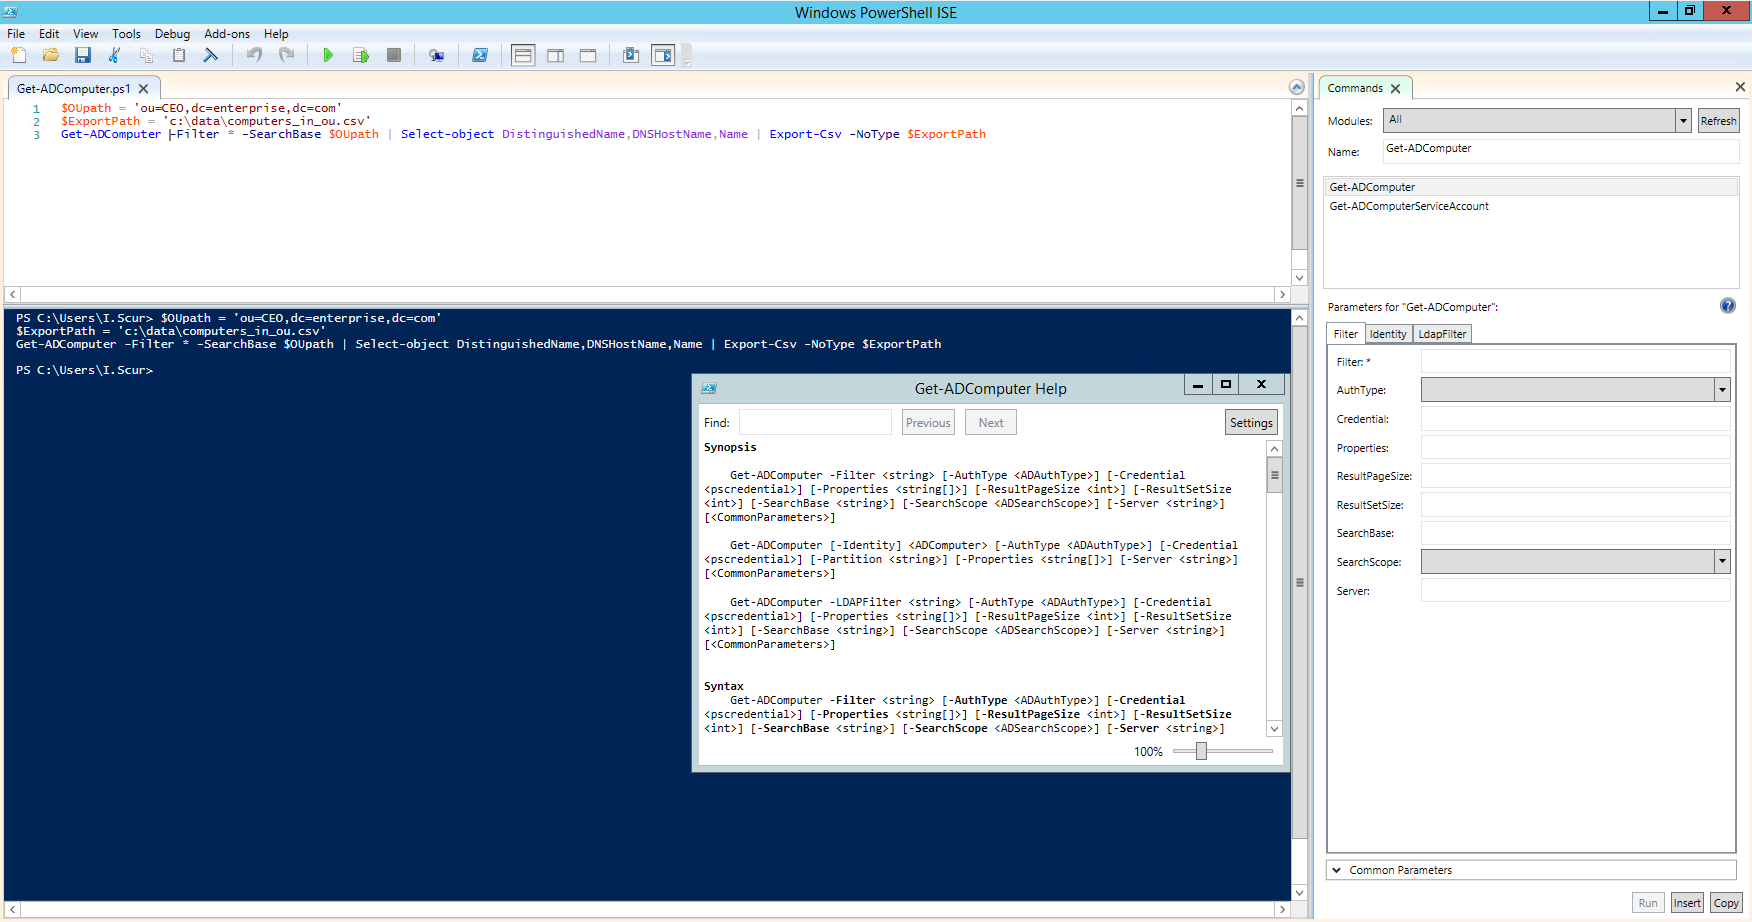
- To launch the PowerShell ISE, type powershell_ise.exe in the Start menu. Using the PowerShell ISE is the preferred way to work with the scripting language, because it provides syntax highlighting, auto-filling of commands and other automation features that simplify script development and testing.
Preparing to Run PowerShell Scripts
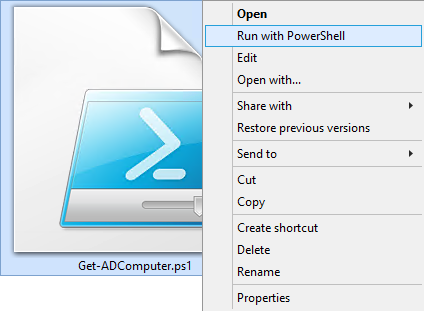
PowerShell scripts are stored in.ps1 files. By design, you cannot run a script by simply double-clicking a file; this helps avoid accidental harm to your systems. Instead, to execute a script, right-click it and click “Run with PowerShell”:
In addition, there is policy that restricts script execution. You can check this policy by running the Get-ExecutionPolicy command in PowerShell:

You will get one of the following values:
- Restricted— No scripts are allowed. This is the default setting, so you will see it the first time you run the command.
- AllSigned— You can run scripts signed by a trusted developer. With this setting in place, before executing, a script will ask you to confirm that you want to run it.
- RemoteSigned— You can run your own scripts or scripts signed by a trusted developer.
- Unrestricted— You can run any script you want.
To start working with PowerShell, you’ll need to change the policy setting from Restricted to RemoteSigned using the Set-ExecutionPolicy RemoteSigned command:

PowerShell Cmdlets
About Cmdlets
A cmdlet is a PowerShell command with a predefined function, similar to an operator in a programming language. Here are some key things to know about cmdlets:
- There are system, user and custom cmdlets.
- Cmdlets output results as an object or as an array of objects.
- Cmdlets can get data for analysis or transfer data to another cmdlet using pipes (I’ll discuss pipes more in a moment).
- Cmdlets are case-insensitive. For example, it doesn’t matter whether you type “Get-ADUser”, “get-aduser” or “gEt-AdUsEr”.
- If you want to use several cmdlets in one string, you must separate them with a semicolon (;).
Cmdlet Format
A cmdlet always consists of a verb (or a word that functions as a verb) and a noun, separated with a hyphen (the “verb-noun” rule). For example, some of the verbs include:
- Get — To get something
- Set — To define something
- Start — To run something
- Stop — To stop something that is running
- Out — To output something
- New — To create something (“new” is not a verb, of course, but it functions as one)
For practice, try executing the following cmdlets:
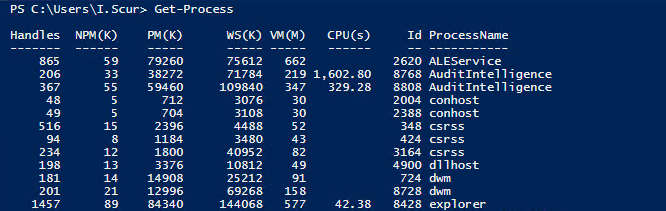
- Get-Process — Shows the processes currently running on your computer:
- Get-Service — Shows the list of services with their status
- Get-Content — Shows the content of the file you specify (for example, Get-ContentC:\Windows\System32\drivers\etc\hosts)
Available Cmdlets
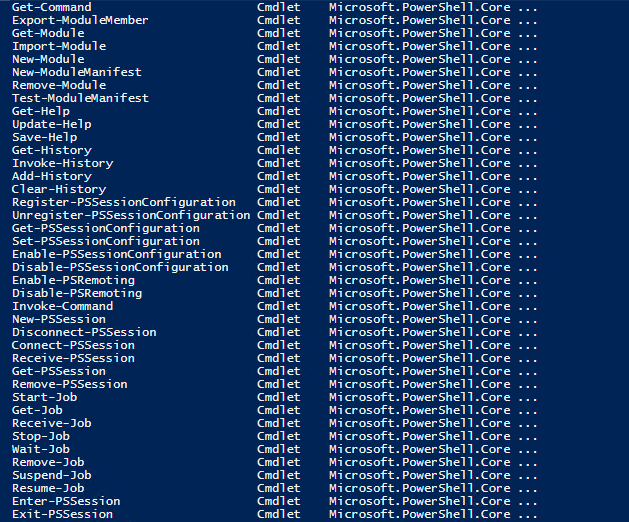
Good news — you don’t need to memorize all cmdlets. You can list all cmdlets by executing the Get-Help -Category cmdlet, which will return the following:
You can also create your own custom cmdlets.
Parameters
Each cmdlet has several parameters that customize what it does. The PowerShell ISE will automatically suggest all valid parameters and their types after you type a cmdlet and a hyphen (-):
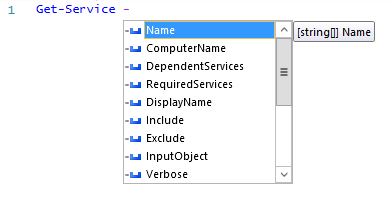
For example, the following cmdlet shows all services whose names start with “W”:
Get-Service -Name W*
Get-Service -Name W*
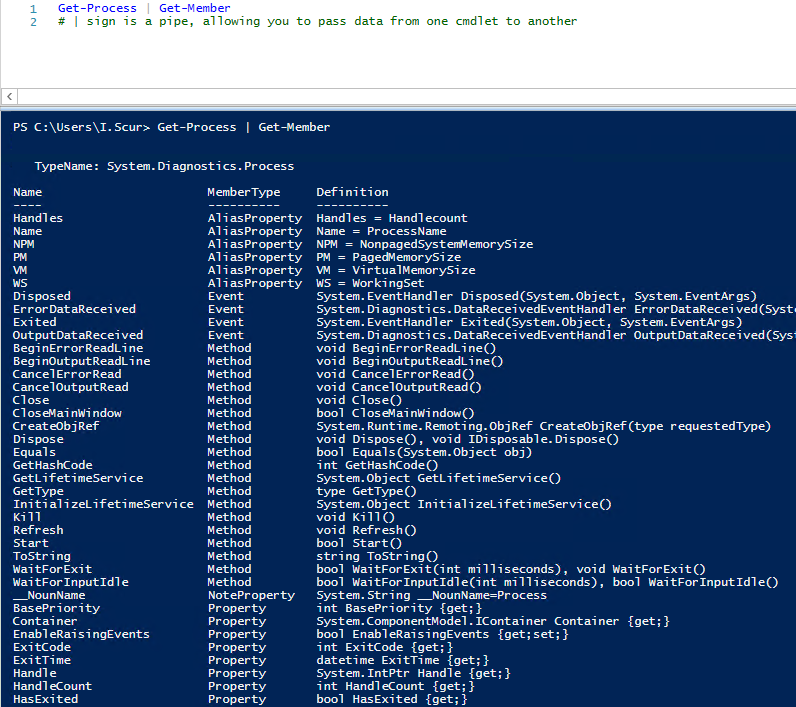
If you forget a cmdlet’s parameters, just use a script like the following, which will display the parameters for the Get-Process cmdlet:
Get-Process | Get-Member
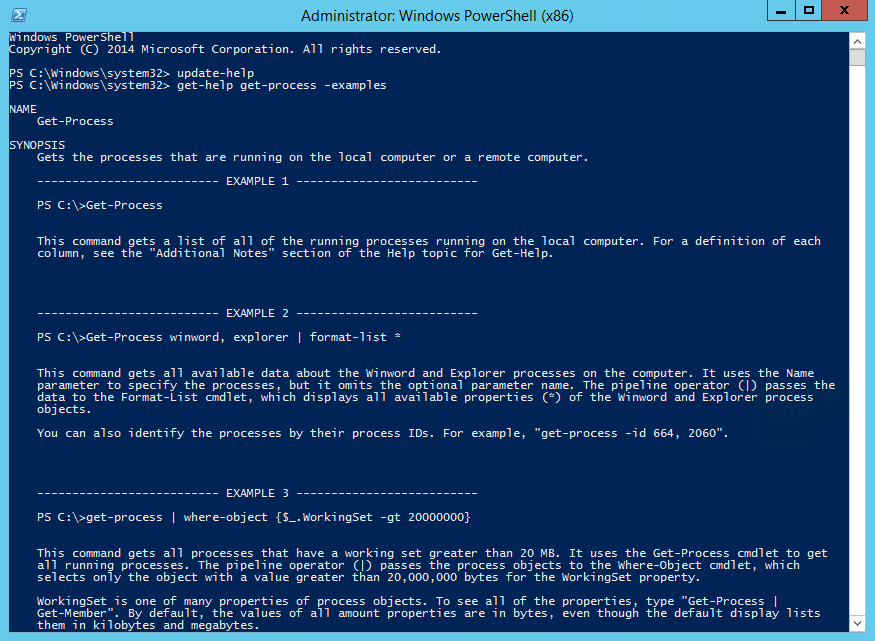
If you still don’t find the cmdlet you need, you can make sure the help is current and then get examples for a cmdlet (such as Get-Process) using a script like this:
Update-Help #to update the help data
Get-Help Get-Process -Examples
Aliases
You can also use aliases, which are shortened cmdlet names. For instance, instead of “Get-Help” you can use just “Help”. Try running the following two commands and see whether you get the same result:
- Start-Process notepad
- start notepad
Similarly, to stop this process, you can use either of the following commands:
- Stop-Process -Name notepad
- spps -Name notepad
To see all aliases, execute the Get-Alias cmdlet.
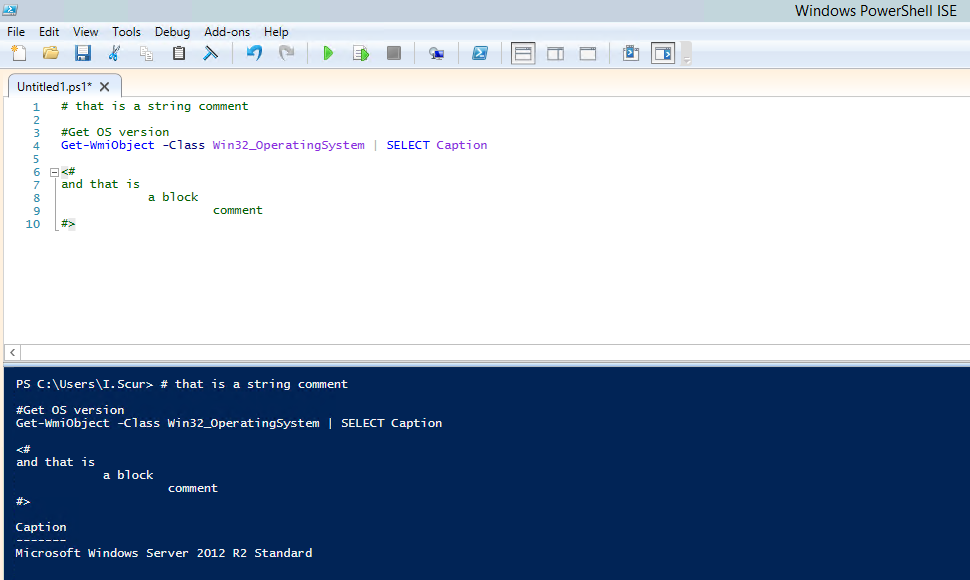
Comments
Leaving comments in a script will help you — and your colleagues — better understand what the script does. A string comment is a single line that starts with a number sign (#), and block comments start and end with number signs and angle brackets and spread across multiple lines.
Pipes
A pipe passes data from one cmdlet to another. I used a pipe earlier to get all properties of an object.
For example, if you execute the following script, you’ll get all services sorted by their status:
Get-Service | Sort-Object -property Status
You can also use a pipe to output text to a file using a script like the following:
"Hello, World!" | Out-File C:\ps\test.txt
You can use multiple pipes. For instance, the following script lists all services, with the first pipe excluding stopped services and the second pipe limiting the list to display names only:
Get-Service | WHERE {$_.status -eq "Running"} | SELECT displayname
# “$_.” defines current element in the pipe
Summary
Let’s quickly summarize the key points of this Windows PowerShell tutorial. Now you know how to run PowerShell, how to change execution policy, what a cmdlet is, how to pass data using pipe and how to get object properties. Keep in mind that if you forget something, you can always use the Get-Help cmdlet.
I hope you found this PowerShell for beginners useful!
In the next parts of this free PowerShell tutorial, I’ll cover variables, arrays and cycles, which are used in PowerShell scripting to simplify the administration of Windows Servers.
In the meantime, you might want to check out the following PowerShell scripts used by IT professionals to address specific cases:
- How to Get AD User Group Membership Reports
- How to Find Disabled or Inactive Users in Active Directory
- How to Find Inactive Computers in Active Directory
- How to Get a List of Expired User Accounts in AD
- How to Find Locked Out User Accounts in Active Directory
- How to List All User Accounts on a Windows System
And if you are just getting started with PowerShell, I recommend the following resources:
No comments:
Post a Comment