One key feature of the nopCommerce is its pluggable modular/layered architecture which allows additional functionality and presentation elements to be dynamically added to the application at runtime. This pluggable modularized architecture makes it easy to create and manage your nopCommerce based store site.
What Are Plugins in nopCommerce?
Plugins are used to extend the functionality of nopCommerce. nopCommerce has several types of plugins. Some examples are payment methods (such as PayPal), tax providers, shipping method computation methods (such as UPS, USP, FedEx), widgets (such as 'live chat' block), and many others. nopCommerce is already distributed with many different plugins. You can also search various plugins on the nopCommerce official site to see if someone has already created a plugin that suits your needs. If not, this article will guide you through the process of creating your own plugin.
A recommended name for a plugin project is "Nop.Plugin.{Group}.{Name}". {Group} is your plugin group (for example, "Payment" or "Shipping"). {Name} is your plugin name (for example, "PayPalStandard"). For example, PayPal Standard payment plugin has the following name: Nop.Plugin.Payments.PayPalStandard. But please note that it's not a requirement. And, you can choose any name for a plugin. For example, "MyGreatPlugin".
The Plugin Structure, Required Files, and Locations
First thing you need to do is to create a new "Class Library" project in the solution. It's a good practice to place all plugins into \Plugins directory in the root of your solution (do not mix up with \Plugins subdirectory located in \Nop.Web directory which is used for already deployed plugins). It's a good practice to place all plugins into "Plugins" solution folder (you can find more information about solution folders here).
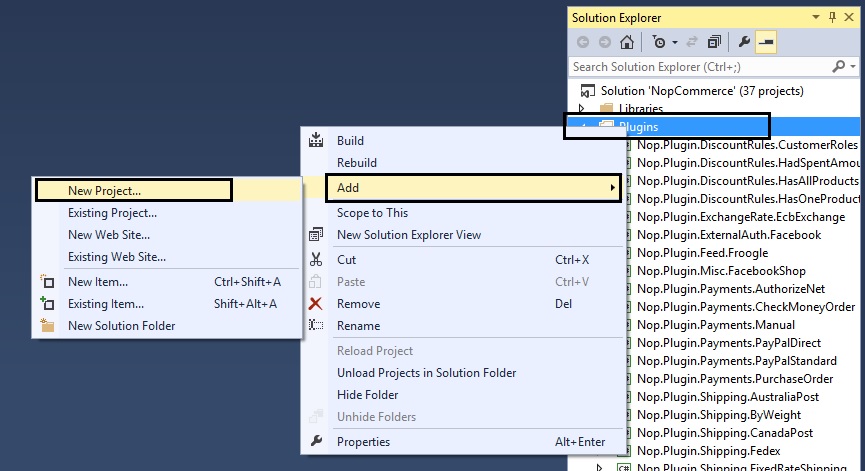
Steps to Create a New Custom Plugin in nopCommerce
Step 1) Open the nopCommerce solution in Visual Studio (remember you need full source code)
Step 2) Right click on the plugin folder: Add > New Project
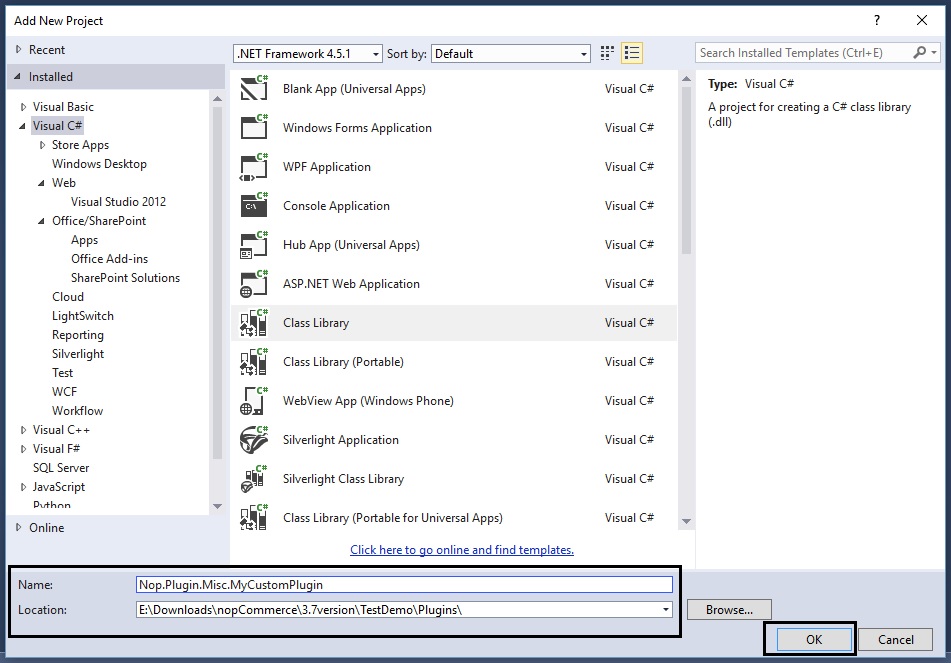
Step 3) On the add new project window, select: .NET Framework 4.5.1
Select: Visual C#
Select: Class Library

Step 4) Now, name the plugin and set the location as follows:
In this case we are naming the plugin: Nop.Plugin.Misc.MyCustomPlugin
Location: You will need to click on the "Browse" button and select the plugin folder that contains the source code of all the plugins (not the folder inside Nop.Web that only contains the compiled dlls)
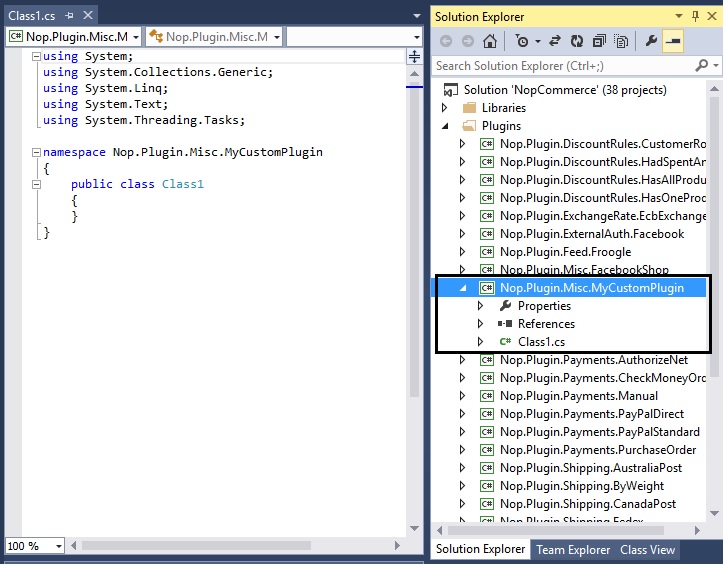
Step 5) Now, you should be able to see your custom plugin project in the solution explorer like this:
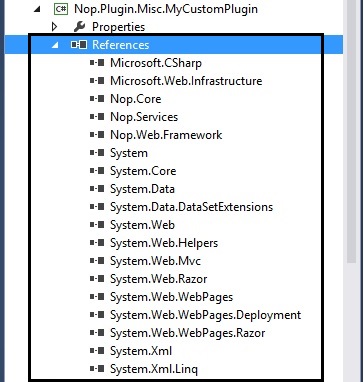
Step 6) Now is the time to add all the correct references. Go to: References > Add Reference…
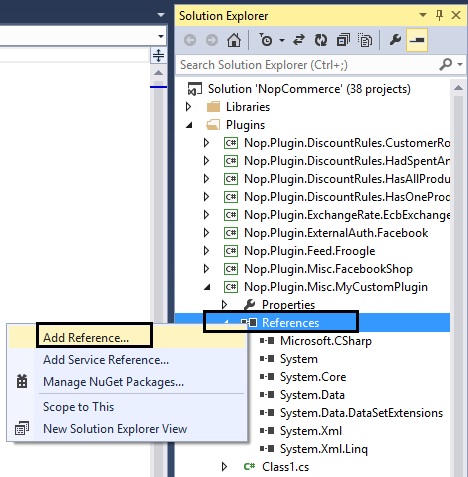
You will need to add all the references (see pic below). In case you are not able to find the right reference, simple go to any other plugin that has it and get the reference from there.
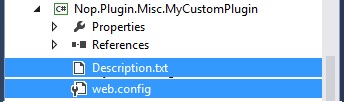
Step 7) You need to configure your custom plugin in a proper structure.
Description.txt: The next step is creating a Description.txt file required for each plugin. This file contains meta information describing your plugin. Just copy this file from any other existing plugin and modify it for your needs.
Web.config: You should also create a web.config file and ensure that it's copied to output. Just copy it from any existing plugin.
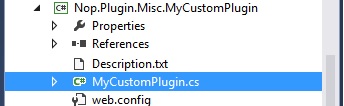
Step 8) Add a class MyCustomPlugin.cs and use the following code:
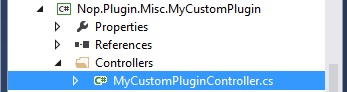
Step 9) Add a class MyCustomPluginController.cs (in folder “Controllers” within your plugin) and use the following code:
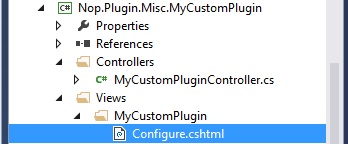
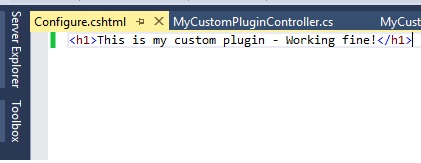
Step 10) Add a Configure.cshtml (View) – In this case we are creating a blank plugin:
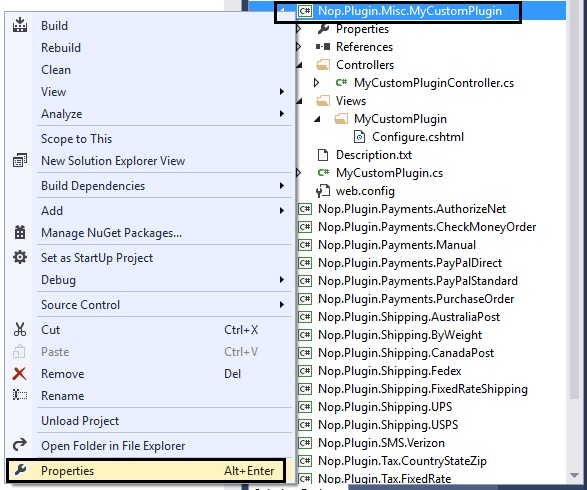
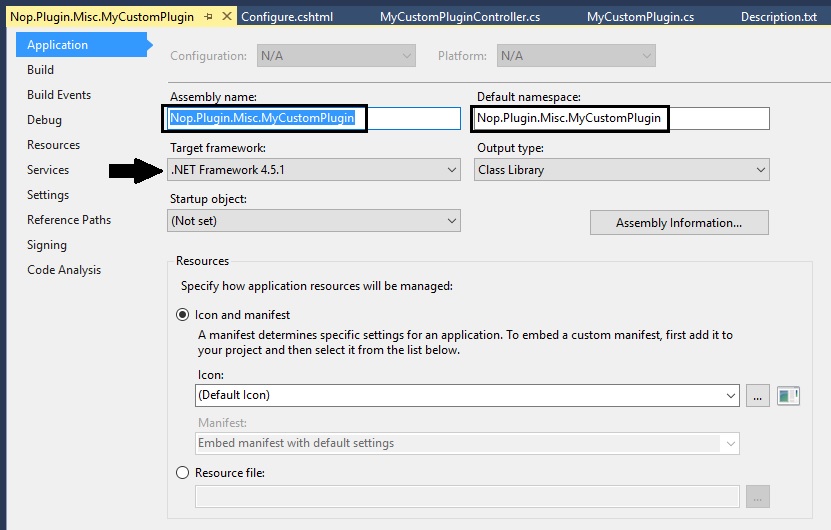
Step 11) Right click on the "Nop.Plugin.Misc.MyCustomPlugin" project and click "Properties"
Make sure the assemble name and default namespaces are as follows (along with the .NET Framework):
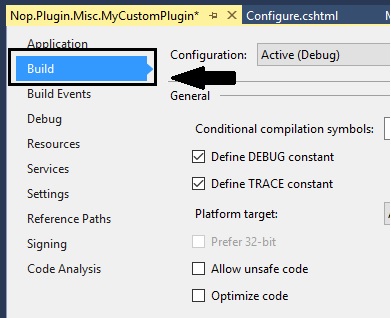
Go to the left tab "Build" in the properties window:
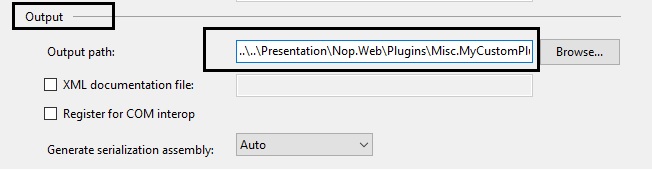
Scroll down to "Output" and make sure the path is same as: ..\..\Presentation\Nop.Web\Plugins\Misc.MyCustomPlugin\
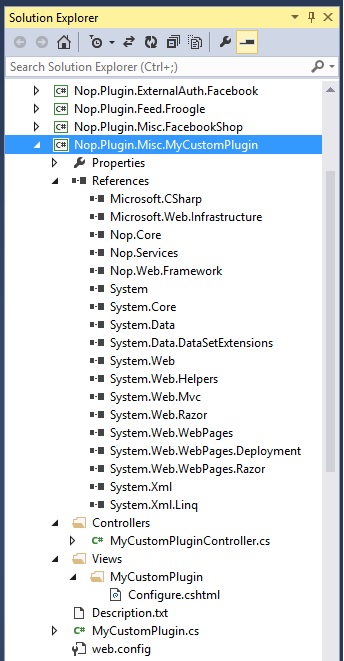
Step 12) Make sure everything is saved and looks like this (and follows this structure):
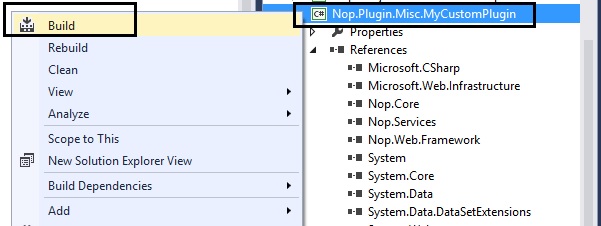
Step 13) Right click on your custom plugin project and click "Build":
Step 14) After re-building your project, run the whole solution and go to the Administration section and "Clear cache":

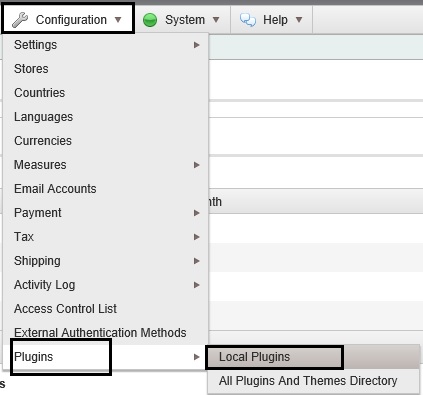
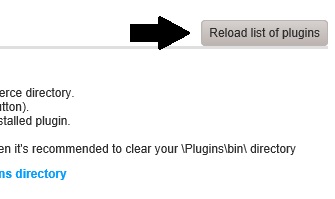
Step 15) Go to the plugin directory and click on the button "Reload list of plugins":
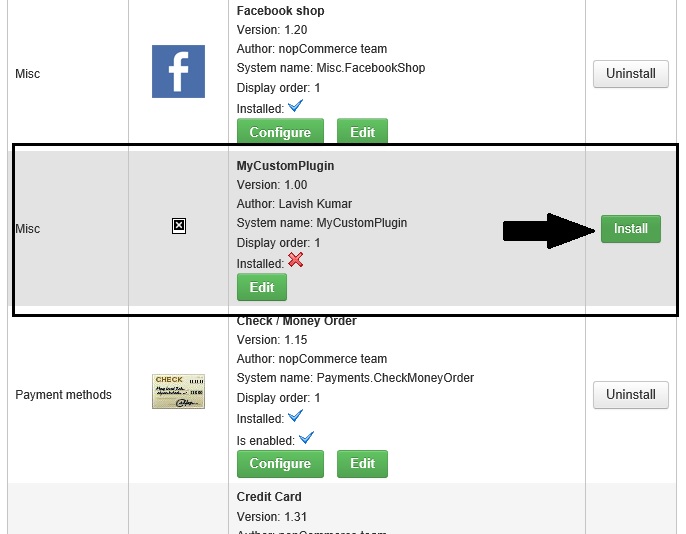
Step 16) Now, if you scroll down, you should be able to see your new custom plugin in the list of plugins. Click on the "Install" button for your custom plugin:
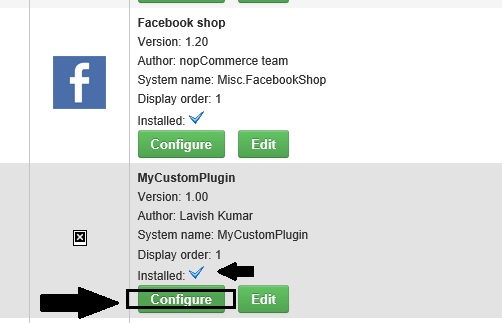
Step 17) Click on the "Configure" button for your custom plugin:
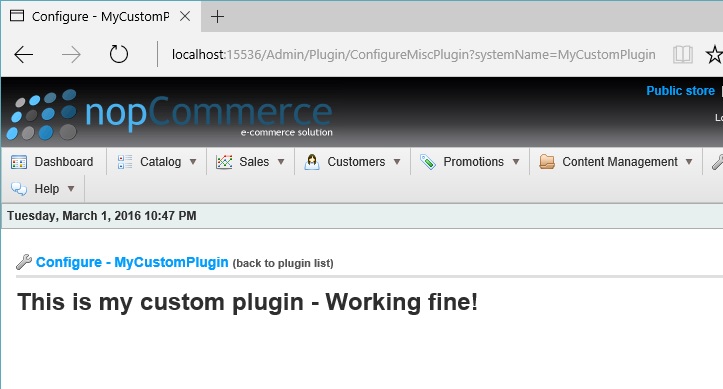
If everything worked correctly without any issues, you should be able to see this page:
Upgrading nopCommerce version may break plugins: Some plugins may become outdated and no longer work with the newer version of nopCommerce. If you have issues after upgrading to the newer version, delete the plugin and visit the official nopCommerce website to see if a newer version is available. Many plugin authors will upgrade their plugins to accommodate the newer version, however, some will not and their plugin will become obsolete with the improvements in nopCommerce. But, in most cases, you can simply open an appropriate Description.txt file and update SupportedVersions field.
- nopCommerce can be download here: http://www.nopcommerce.com/downloads.aspx
- nopCommerce Version (used in this article): Version 3.70
- nopCommerce Support: http://www.nopcommerce.com/boards/
No comments:
Post a Comment